- Important Notes
- Theme Update
- Basic Installation
- Installing and Activating Plugins
- Migration From a Theme
- Importing The Demo Data
- Reading Settings
- Permalink Structure
- Menus
- Sensei Plugin
- Visual Composer Plugin
- Events Plugin
- Page Templates
- Fullwidth No Wrap Template
- Portfolio template
- Setting Up Blog Page
- Building forms
- Layer Slider Plugin
- Sidebars
- Theme Options
- Shortcodes
- Post-thumbnails
- How to Translate
- CSS
- Sources and Credits
- To use Skilled Theme, you must be running:
- WordPress 3.1 or higher
- PHP5.4 or higher
- and mysql 5 or higher
- We have tested it with Mac, Windows and Linux. Below is a list of items you should ensure your host can comply with:
- Check to ensure that your web host has the minimum requirements to run WordPress.
- Always make sure they are running the latest version of WordPress.
- You can download the latest release of WordPress from official WordPress website.
- Always create secure passwords for FTP and Database.
Sensei Plugin is not included. You need to purchase it separately hereVisual Composer, Ultimate Addons for Visual Composer and Layer Slider pluginsare included with the theme but you do not get purchase codes for these plugins. That means that automatic updates for the plugins will not be available to you unless you buy a regular license for the plugin. We do not recommend that you buy regular licenses for the plugins because theywill be updated with theme updates.-
The XML file is included within the download package which will be used to import the content.
-
Navigate to WP Admin -> Tools -> Import.
-
Select and install WordPress importer.
-
Select the XML file and upload it. In a few minutes it will install and upload all content.
-
Now navigate to WP Admin -> Appearance -> Menus page and select the newly created menu and assign it to “Main Navigation” location.
-
Next, navigate to WP Admin -> Settings -> Reading Settings and set a front page.
- page
- events
- teacher
- course
- Regular
- Footer Top
- style.css - Default CSS
- jQuery - http://jquery.com/
- Font Awesome - http://fortawesome.github.io/Font-Awesome/
Table of Contents
Important Notes
Recommended PHP Configuration Limits
Many issues that you may run into such as: white screen, demo content fails when importing and other similar issues are all related to low PHP configuration limits. The solution is to increase the PHP limits. You can do this on your own, or contact your web host and ask them to increase those limits to a minimum as follows:
max_execution_time |
180 |
memory_limit |
128M |
post_max_size |
32M |
upload_max_filesize |
32M |
Theme Update
Step 1
It’s recommended that you make a backup of the theme prior to updating. Read this
Step 2
If you want to avoid having your site temporarily unstyled during the theme update you can install any “Coming Soon” plugin.
Step 3
Note: If you have activated the child theme leave it as is. You only want to delete/update the theme.
From your WordPress dashboard, navigate to Appearance/Themes. Activate a different theme, choose delete files for your theme, then upload the new theme and activate.
The same goes for the required plugins. You can freely deactivate them, delete them and reinstall them again with the theme, just like you would on the first theme install.
Additional Steps
If your server is slow and you are not able to complete the installation process please use FTP and replace the theme and the plugins directly.
It seems scary but you really won’t loose any of your data. The only exception is if you have made edits to theme files like header.php, footer.php etc. These changes will need to be made again to the new files. But all of your content and theme settings are preserved.
Basic Installation
To install this theme you must have a working version of WordPress already installed. For information in regard to installing the WordPress platform, please see the WordPress Codex
Extract the zipped package downloaded from ThemeForest to your desktop, in the extracted package you will find skilled-1.0.0-installable.zip file which is the wordpress theme.
You can install the theme in two ways:
FTP:
Extract skilled-1.0.0-installable.zip file and upload the extracted folder to /wp-content/themes/ folder on your server.
WordPress:
Navigate to Appearance -> Add New Themes -> Upload page. Select skilled-1.0.0-installable.zip file. Press the Install Now button to upload and install the theme.
After uploading the theme, you have to activate it. Navigate to Appearence -> Themes page to activate the theme.
Once the theme is activated you will be automatically redirected to Theme Activation Page. If this does not happen automatically please navigate to Admin/Appearence/Theme Activation. There you’ll find detailed instructions to compete the installation process.
Installation steps listed bellow are general guide lines but we highly recommended to follow the process in Admin/Appearance/Theme Activation
Installing and Activating Plugins
After theme installation you need to install and activate plugins this theme requires to work properly. You will see a list of required and recommended plugins. First you need to install them and than make sure you activate them.
Migration From a Theme
If you are migrating from a theme which used the native featured images functionality of WordPress, please use Regenerate Thumbnails plugin to resize all the thumbnails.
Importing The Demo Data
We have included the exported XML file from our demo. (Please note that images from our demo site are not included.)
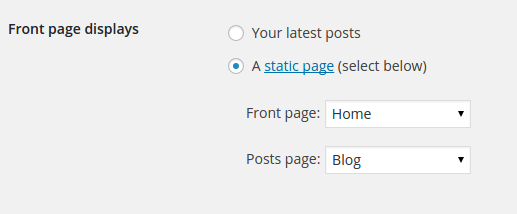
Reading Settings
To setup one of these pages as Homepage, navigate to WP Admin -> Settings -> Reading Settings and set the newly created page as front page.
Permalink Structure
Don’t forget to set your permalink structure to have pretty links. This is important also for Breadcrumbs to be able to print full paths. So go to Admin/Settings/Permalinks and select something, recommended are “Day and name” and “Month and name”. Click “Save Changes”.
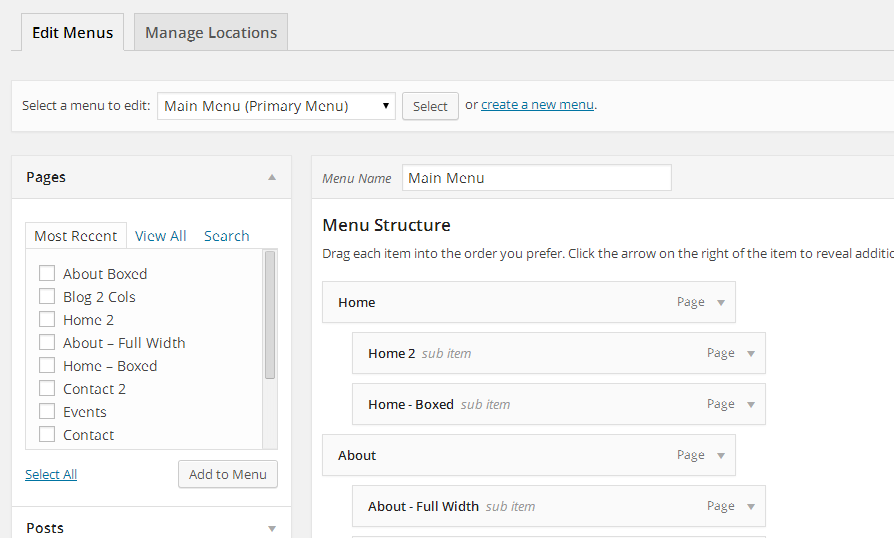
Menus
This theme supports custom WordPress menu with two level dropdown support.
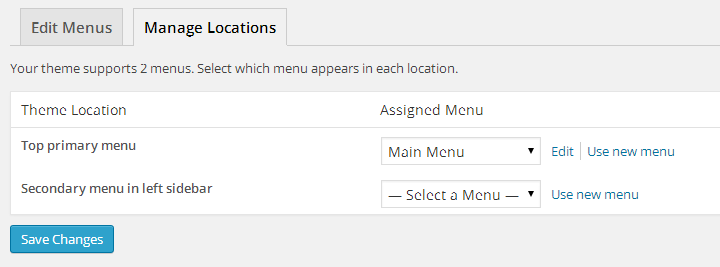
To setup the menus, navigate to Apperance -> Menus page. Enter a name for your menu and add links to the menu by using the options given on the left sidebar. You can manage your menus using the drag and drop functionality. After setting up your menu, click on Manage Locations tab and assign your menu to a location on you site and hit the “Save” button. This theme has 2 menu locations Primary Menu and Secondary Menu, First is in the header and the second is in the footer.
Edit Menus
Manage Locations
Sensei Plugin
Important! Skilled Theme does not include Sensei Plugin.
This plugin needs to be purchased separately. Please follow this link. Also, please read the documentation on the plugin.
In order to have registration form on your site you need to enable “Anyone can register” in Admin/Settings/General/Membership

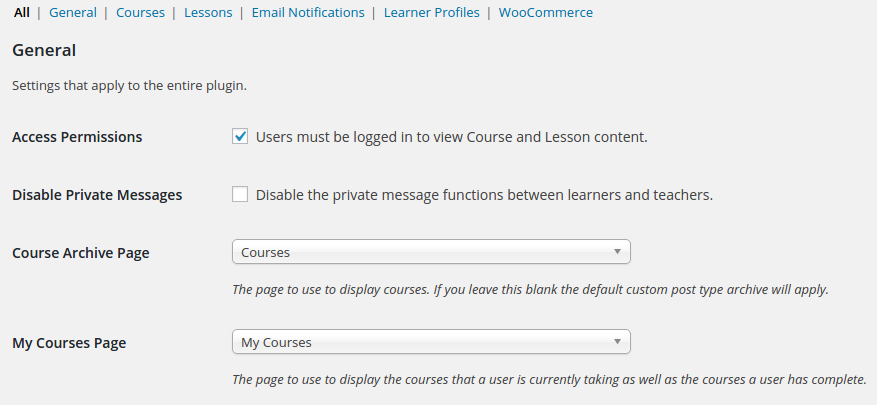
Sensei Settings
Admin/Sensei/Settings
To ensure that Sensei Section of your site is setup the same as our demo you need to adjust these settings:
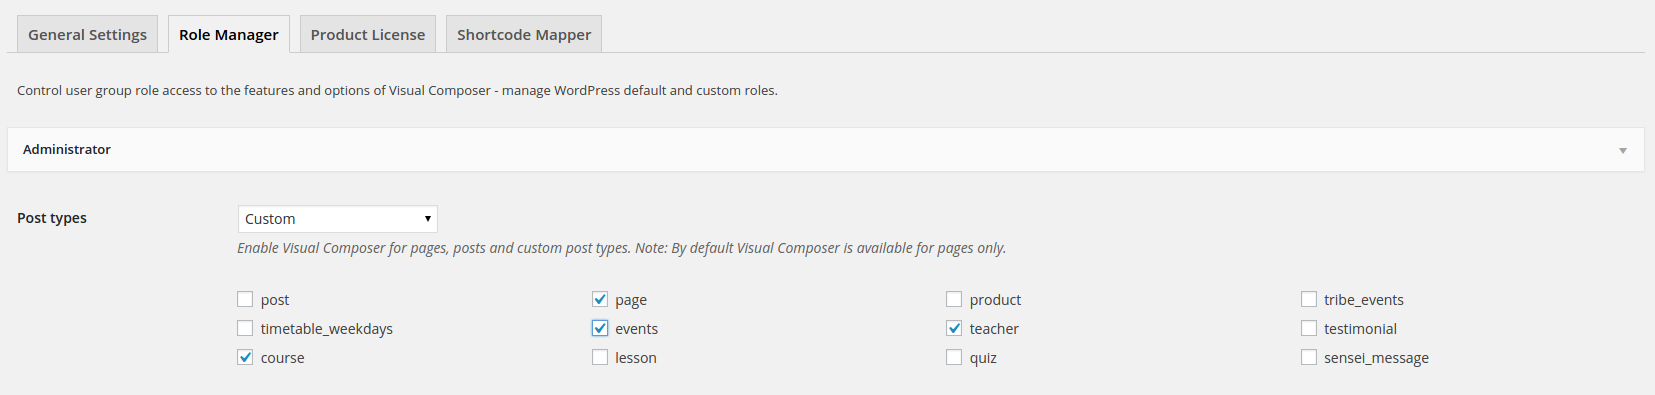
Visual Composer Plugin
Skilled Theme comes with Visual Composer Plugin. Please read the documentation on this plugin. It is located in documentation folder within your main zip download.
Visual Composer is used on pages and several custom types. Make sure to enable Visual Composer to work with:
Admin/Visual Composer/Role Manager
Events Plugin
Make sure to visit Events settings page. Go to Display tab and set a template for displaying events.
Layer Slider Plugin
Skilled Theme comes also with Layer Slider Plugin. Please read the documentation on this plugin. It is located in help folder within your main zip download. Demo sliders can be found in assets/layer-slider/demo/sliders folder. What you need to do is import these using Layer Slider import functionality. Please note that for the text in our demo sliders we used our custom css-classes. These classes are listed in Theme Options and can be customized there. In Layer Slider these custom classes are under each slide layer - Attributes tab.
Sidebars
Skilled Theme comes with 2 sidebar areas:
Theme Options
Please visit Admin -> Theme Options to customize the theme.
Shortcodes
Visual Composer plugin is essentially shortcode builder/manager and all the shortcode you may need are available to you through Visual Composer builder. There are a few additional shortcodes included with the TinyMce editor under the dropdown “Theme Shortcodes”
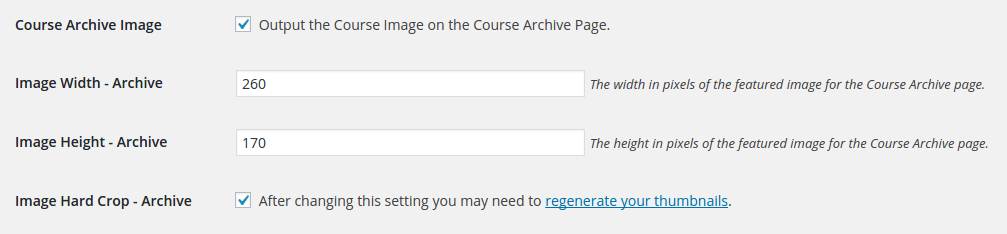
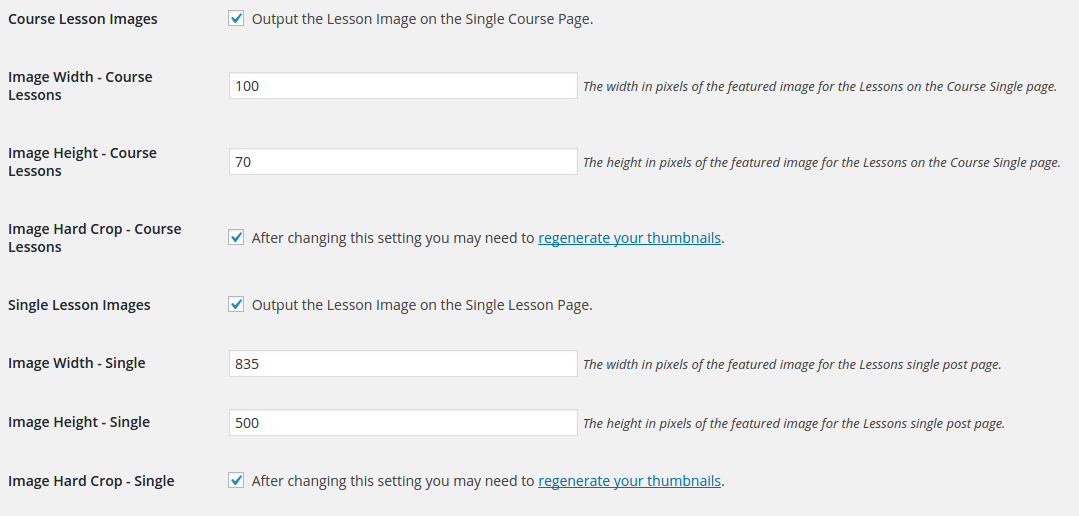
Post Thumbnails
This theme uses the WordPress Post Thumbnails function, this way you can upload one image and WordPress will automatically resize it to all the different thumbnail sizes.
To set a post thumbnail for your post, go to Posts > Add New > Set Featured Image > the normal upload box will now appear, upload your image and click “Use as featured image”.
How to Translate
The translation file is located in languages folder (/wp-content/themes/skilled/languages). Edit the .pot file using POEdit, use the translation field to make replacements.
From the file menu, save file with your language name e.g de_DE.po. It will generate both a .po and .mo file for your translation.
Go to Admin/Settings/General and select Site Language. In our example select Deutsch.
CSS
The CSS files are listed below and we have included a “custom CSS” field in the theme options for users to insert their own custom CSS. Please be sure to put any custom CSS in that field and not in the style.css file. Anything in the custom CSS field will override the style.css file.
Sources and Credits
We’ve used the following images, icons or other files as listed.