-
Skilled Theme, also available from Theme Forest.
-
A recent version of WPML, including the String Translation and Translation Management modules.
-
Skilled Theme online documentation Also, Skilled Theme Youtube videos
-
The WPML Getting Started Guide contains clear explanations of many of the steps involved into turning an Skilled Theme site multilingual with WPML. You’ll want to refer later to some of its subtopics, such as Theme and Plugin Localization, Menu Synchronization, and String Translation. We recommend you keep this guide open while following this tutorial.
- Install the Skilled Theme and activate it.
- Install and activate the core WPML plugins (WPML Multilingual CMS, WPML String Translation, WPML Translation Management), and then other WPML plugins that may depend on them.
- Set up WPML from WPML->Languages. Initial simple three-step setup is self-explanatory, asking you to choose your default language, a set of active languages, and a language selector. (For starters, choose the footer language selector, you can change this later.)
-
Make sure you have the latest versions of the theme and of the WPML plugins, and that they are all activated. These include WPML Multilingual CMS, WPML String Translation and WPML Translation Management.
-
The problem does not appear if the WPML plugins are deactivated, and it does appear when only the core WPML plugins are activated. In other words, try to make sure that it is an issue of compatibility of Skilled Theme with WPML, since otherwise Skilled Theme support is likely to be able to help you better.
How To Use WPML With Skilled Theme
Skilled Theme WPML test site:
What you’ll need:
Essential resources:
Getting Started
These are the main steps you need to follow to get started:
For this tutorial, we use some of the sample content provided with Skilled Theme. In the version we used, this content is available inside the main download package in xml folder.
Translating Skilled Theme home page
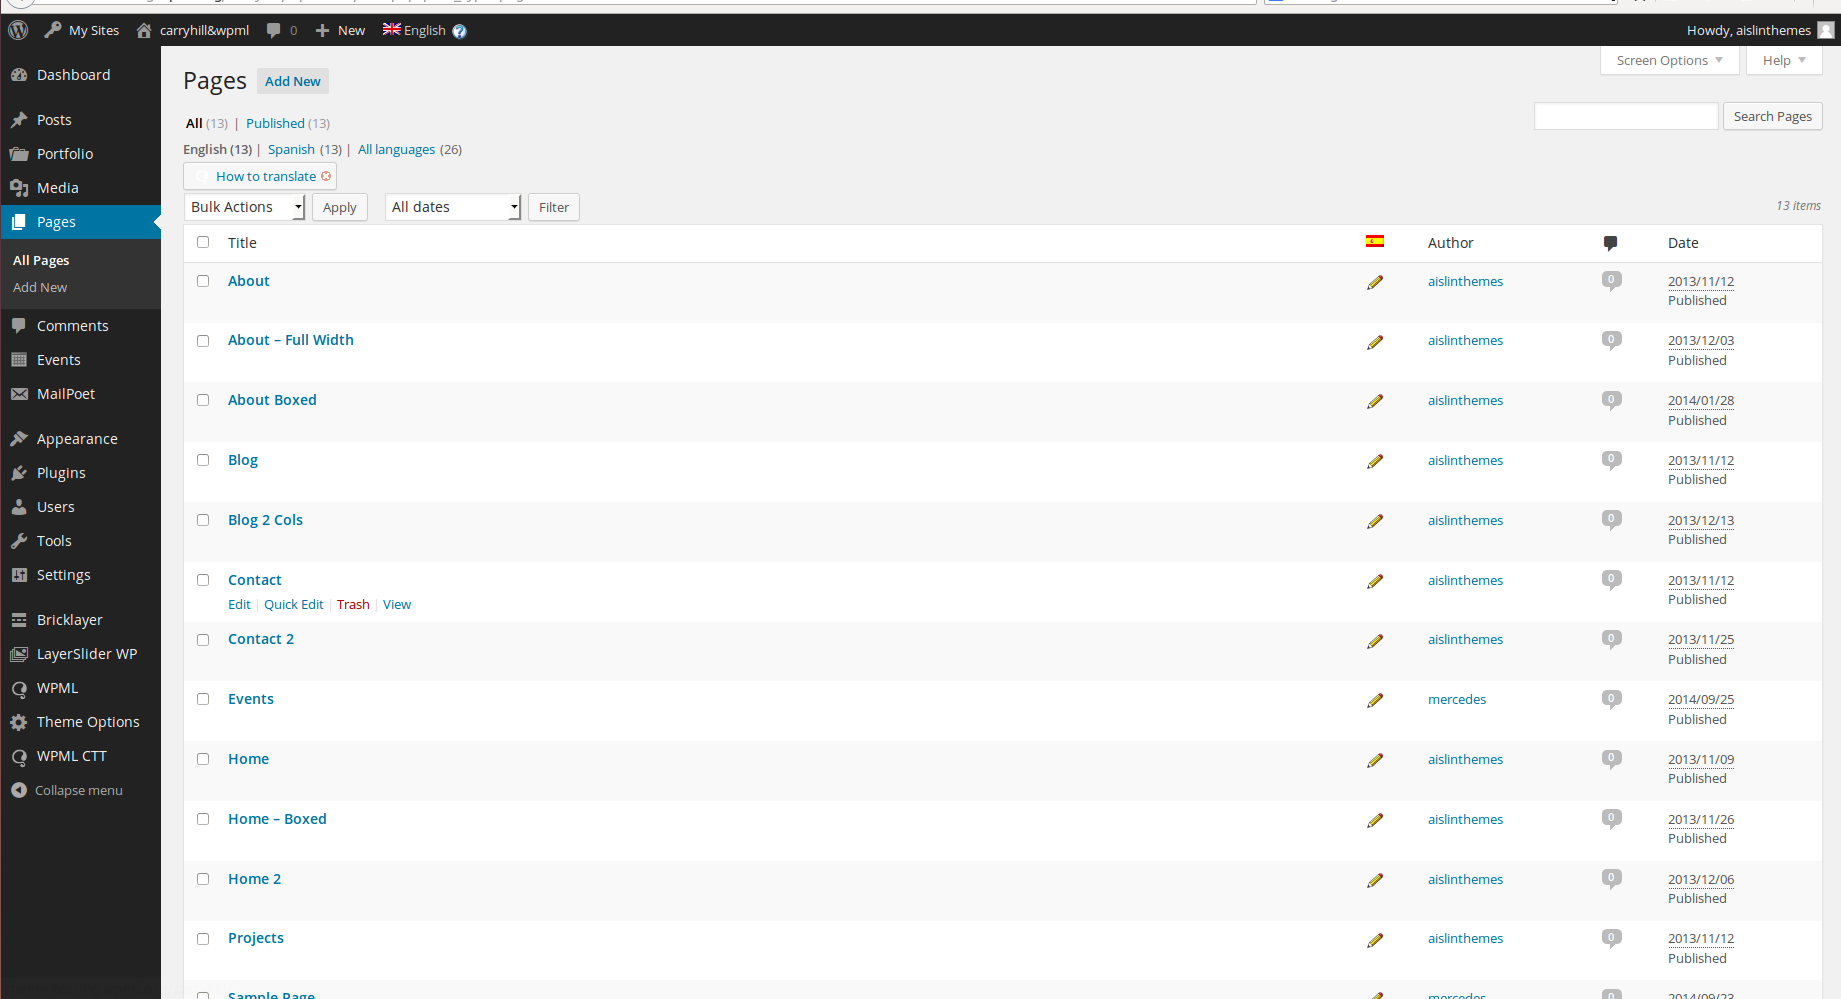
To set up a multilingual site, you obviously need to translate your content. This involves at least translating posts (including custom post types), pages, taxonomies, and menus and other navigational elements. We’ll begin by translating Skilled Theme’s home page. Go to All Pages, and search for ‘home’:
You see columns for each active language, with a pencil icon (for ‘edit translation’) or a ‘+’ icon (for ‘add translation’) next to each page. Go ahead and edit or add the translated page for ‘Home′. In the image, we have just added some dummy translation text.
Translating other pages and posts
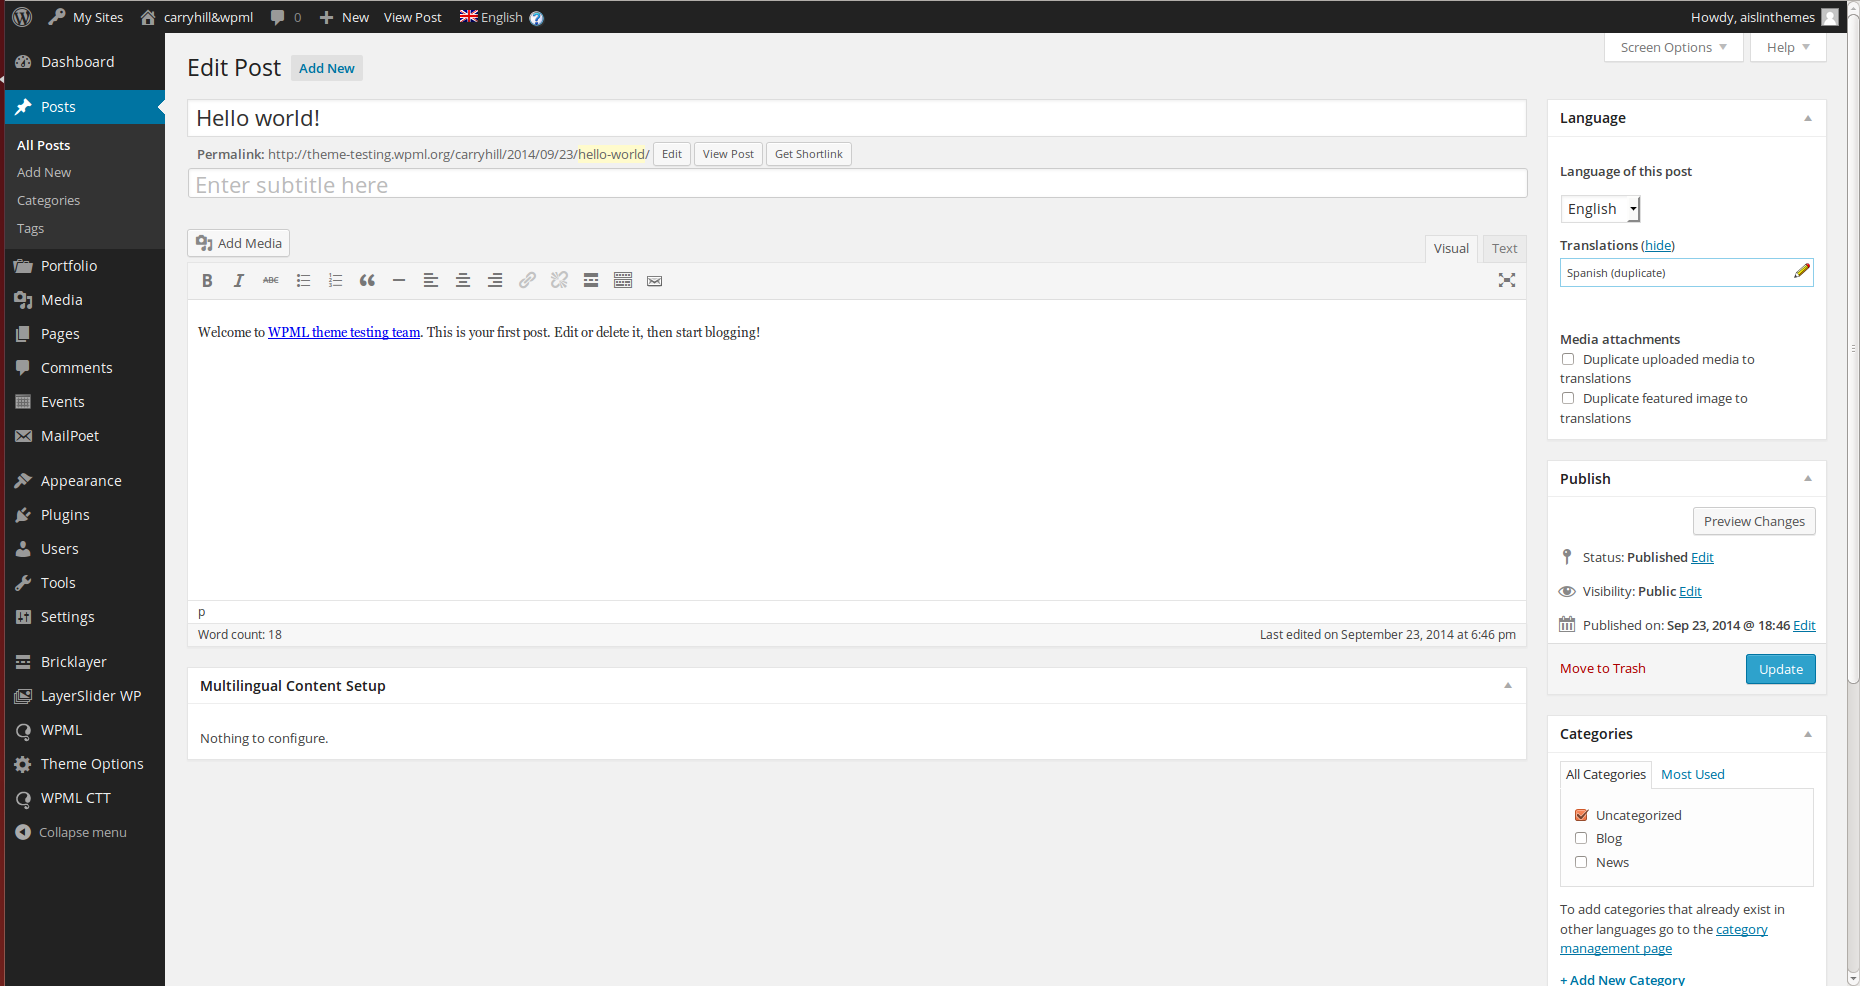
You can translate in a similar way all other pages and posts, including custom post types such as portfolios. For example, here is how to translate a post:
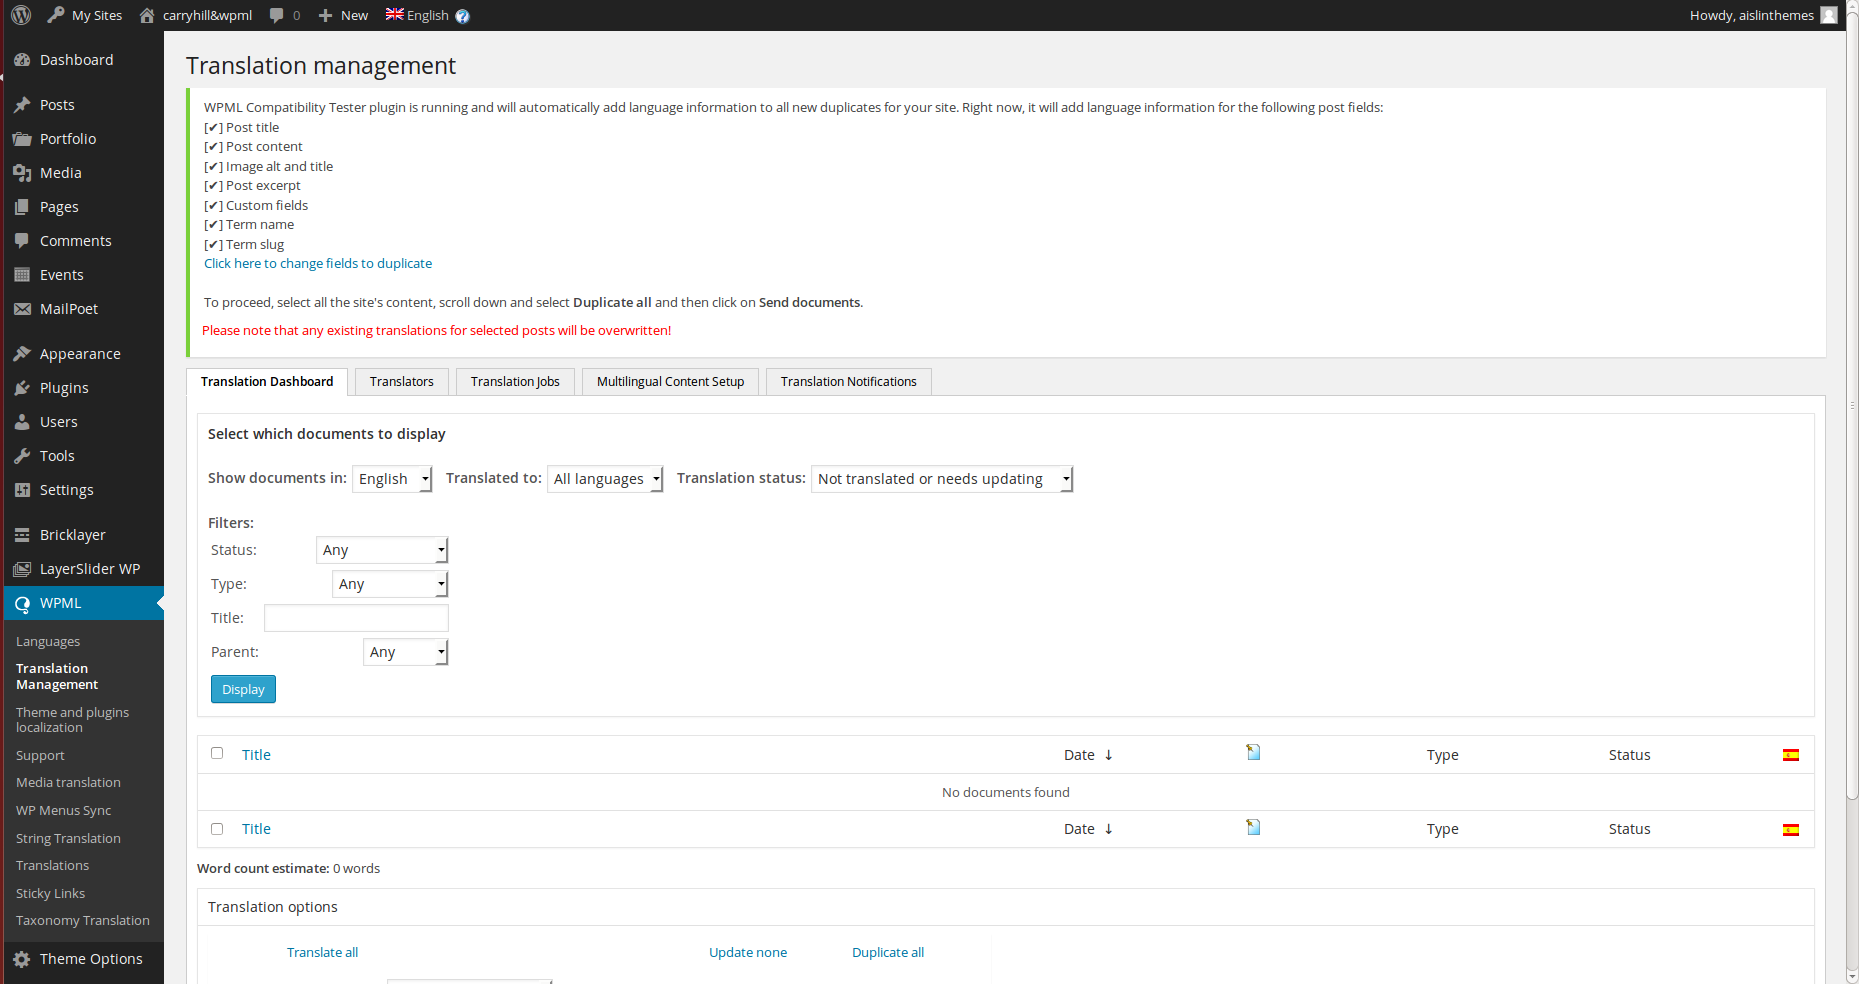
You’ll probably be interested in the process of batch duplication of pages and posts (we actually used it to set up this tutorial). To use this feature, go to WPML->Translation Management, and from the Translation Dashboard (the tab that is opened by default), select the filter you want (Pages/Posts), and click ‘Display’:
Select the pages or posts you want to translate or duplicate (you can select them all by clicking the checkbox besides the ‘Title’ header or footer). Then, at the bottom of the page, choose languages for which you want to translate or duplicate, and ‘Submit Documents’:
For more details, see Displaying Untranslated Content using Content Duplication.
Note: In general, with WPML you can always choose between ‘translating’ or ‘duplicating’ content. If you do the former but want to import content from the original you can always use the buttons to ‘copy content from the original’ in their edit page; if you do the latter (as we did so that all the html in the home page was copied, for example), you can always choose later ‘Translate independently’ so that you can save your edits. Try both procedures to see which one you find better for your workflow. Submitting for translation instead of duplication will later allow you to edit content from WPML->Translations, which provides WPML Translation Editor.
You can also translate post categories, as we did in the sample home page images above. This is done from WordPress Posts->Categories page (you can see it in the menu entries ‘ES Cat1′ and ‘ES Cat2′, translations of ‘Category 1′ and ‘Category 2′). You add a translation to a category by editing it and adding the translation from the bottom of the page. Go ahead and do it for terms such as ‘Design’, ‘Photography’, etc. and check the porfolio samples that come with the sample content.
Translating custom post types and taxonomies
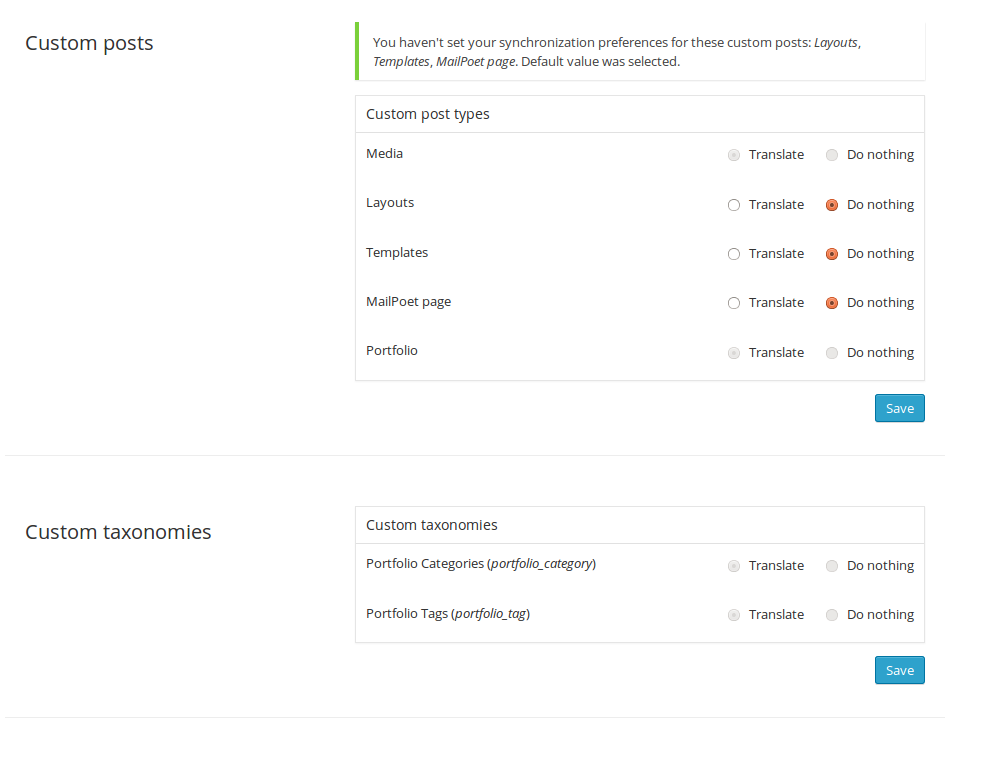
Skilled Theme comes with a rich set of custom post types such as portfolios and sliders, and custom taxonomies. In order to get a similar interface for translation/duplication as for posts and pages, you need to go to WPML->Translation Management, and select the tab ‘Multilingual Content Setup’. At the bottom of the page you’ll see:
You need to select ‘translate’ for the custom post types you want to make translatable. Similarly, if you choose ‘translate’ for custom taxonomies such as ‘skills’, etc. you’ll get a similar interface for translation as for post categories.
Translating menus
WPML can synchronize menus for you. This means that if some entries, for example some pages, posts or categories, are in the English menu, WPML can generate and keep in synch menus for other languages pointing to the translated versions of these pages, posts or categories.
From WordPress Appearance->Menus, and with the imported sample content, you’ll see this:
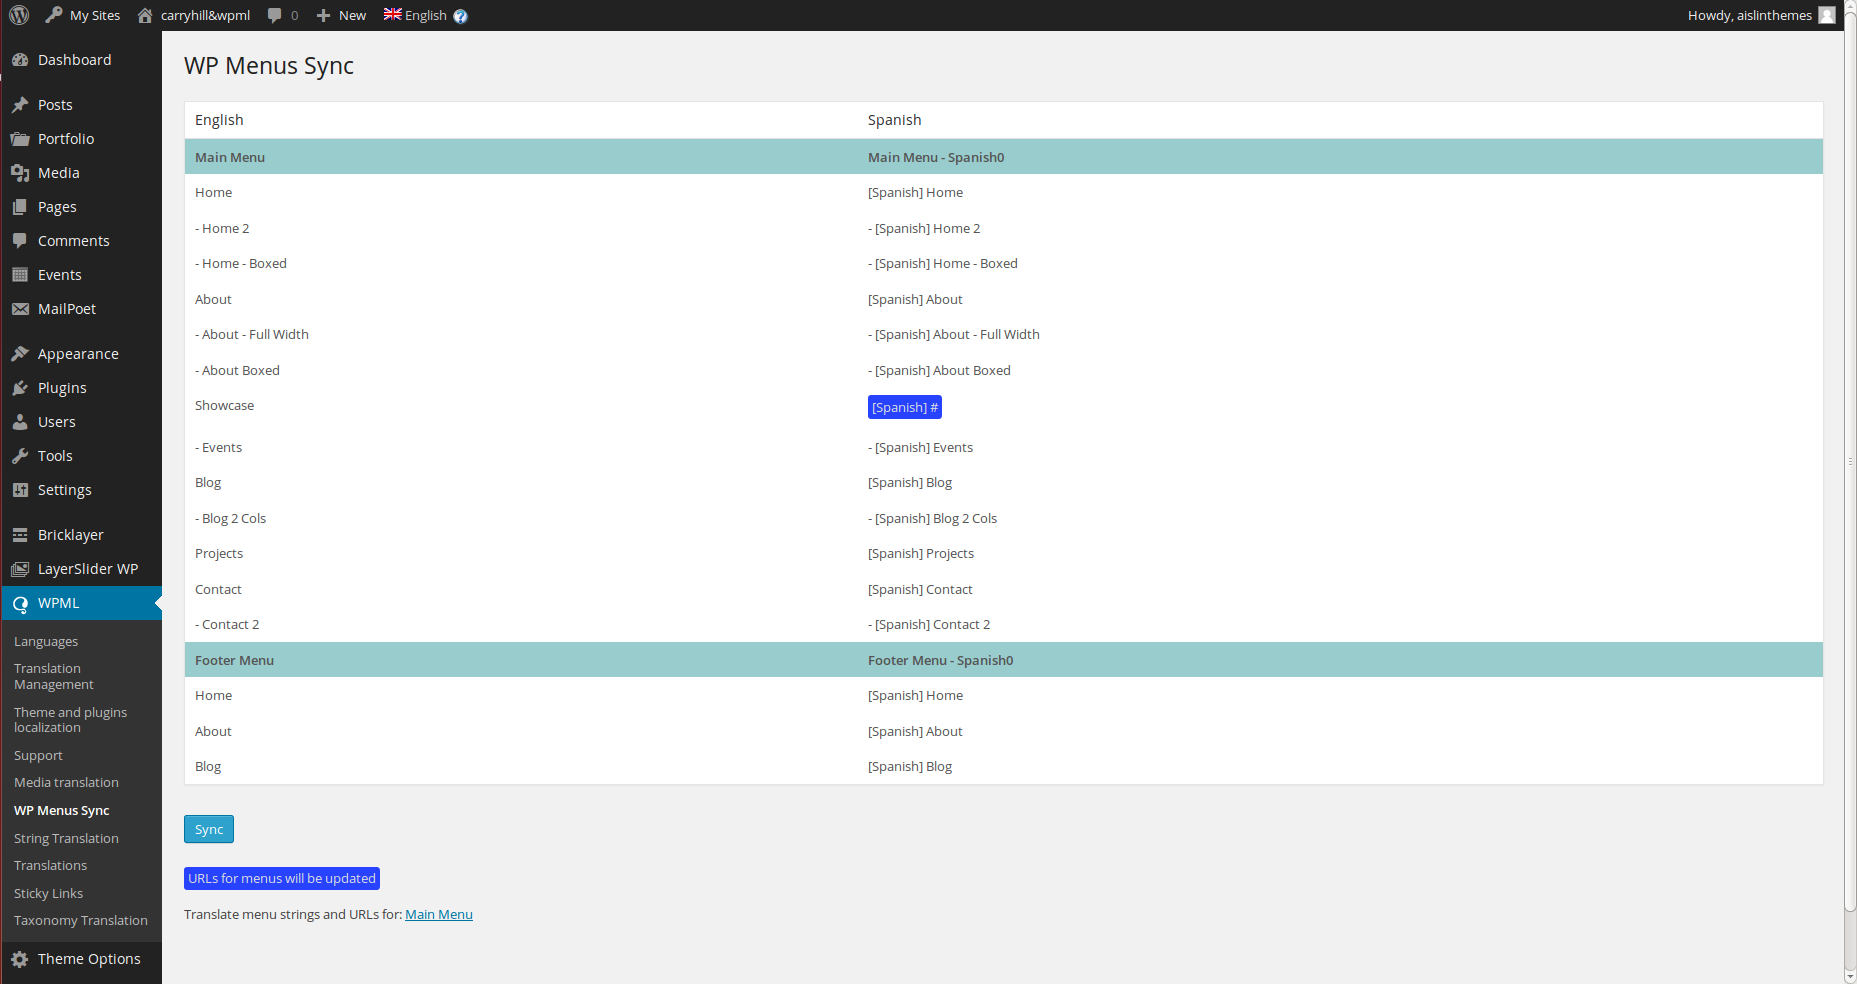
Notice the ‘Synchronize menu’ link top right. When you click on it, you’ll see something like this:
By clicking on the Sync button at the bottom of the page (with its informative legends by its side):
you’ll be presented with a set of menu items that can be translated; select them all, and go ahead to apply the changes.
You can also review this information from WPML->WP Menu Sync. In addition, after the synching operation you can individually edit the menus in each language from WordPress Appearance->Menus. This may be needed for example if you have custom links in your menu.
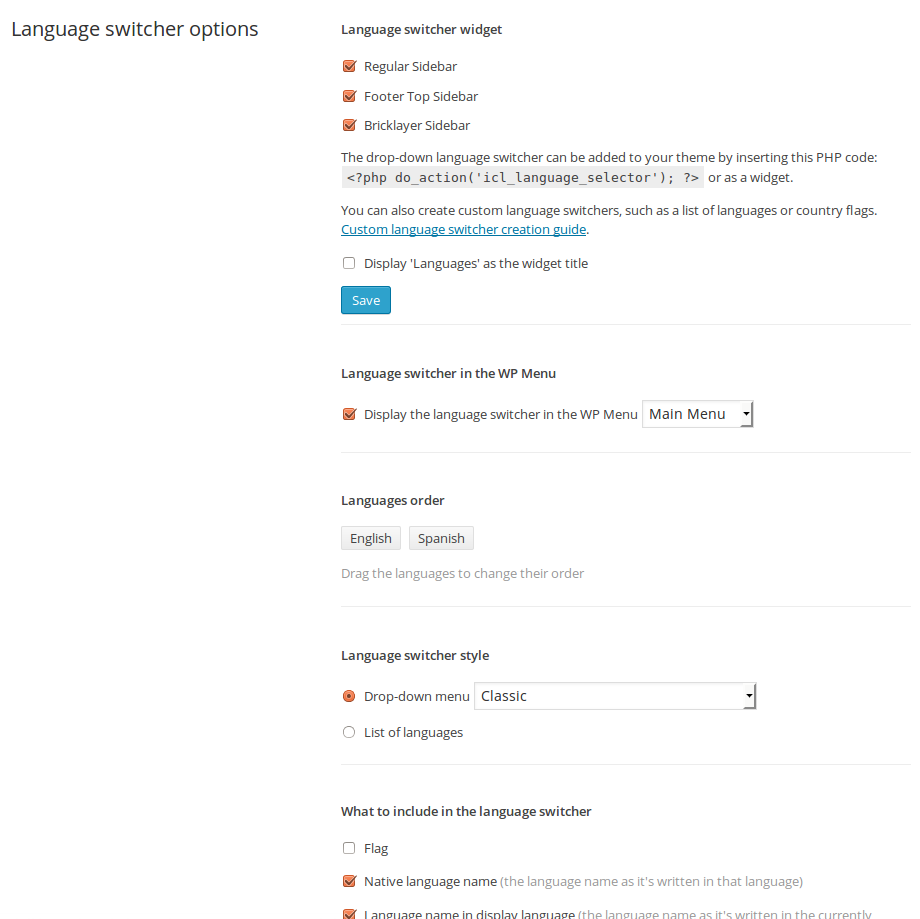
You may now want to revisit your language switcher settings from WPML->Languages if you want to add the selector to Skilled Theme’s main menu. For example, this:
For more information on Menu Synchronization, check WPML Menu Synchronization.
Translating Skilled Theme texts and other strings in your site
Skilled Theme comes with its own localization files, i.e. translations of the theme texts to a number of languages. Sometimes some texts are not translated, so to complete the missing translations you need to follow the procedure for Theme and Plugin Localization. In a nutshell, go to WPML->Theme and Plugin Localization, and click on ‘Scan the theme for strings’. After doing it, you’ll see something like this:
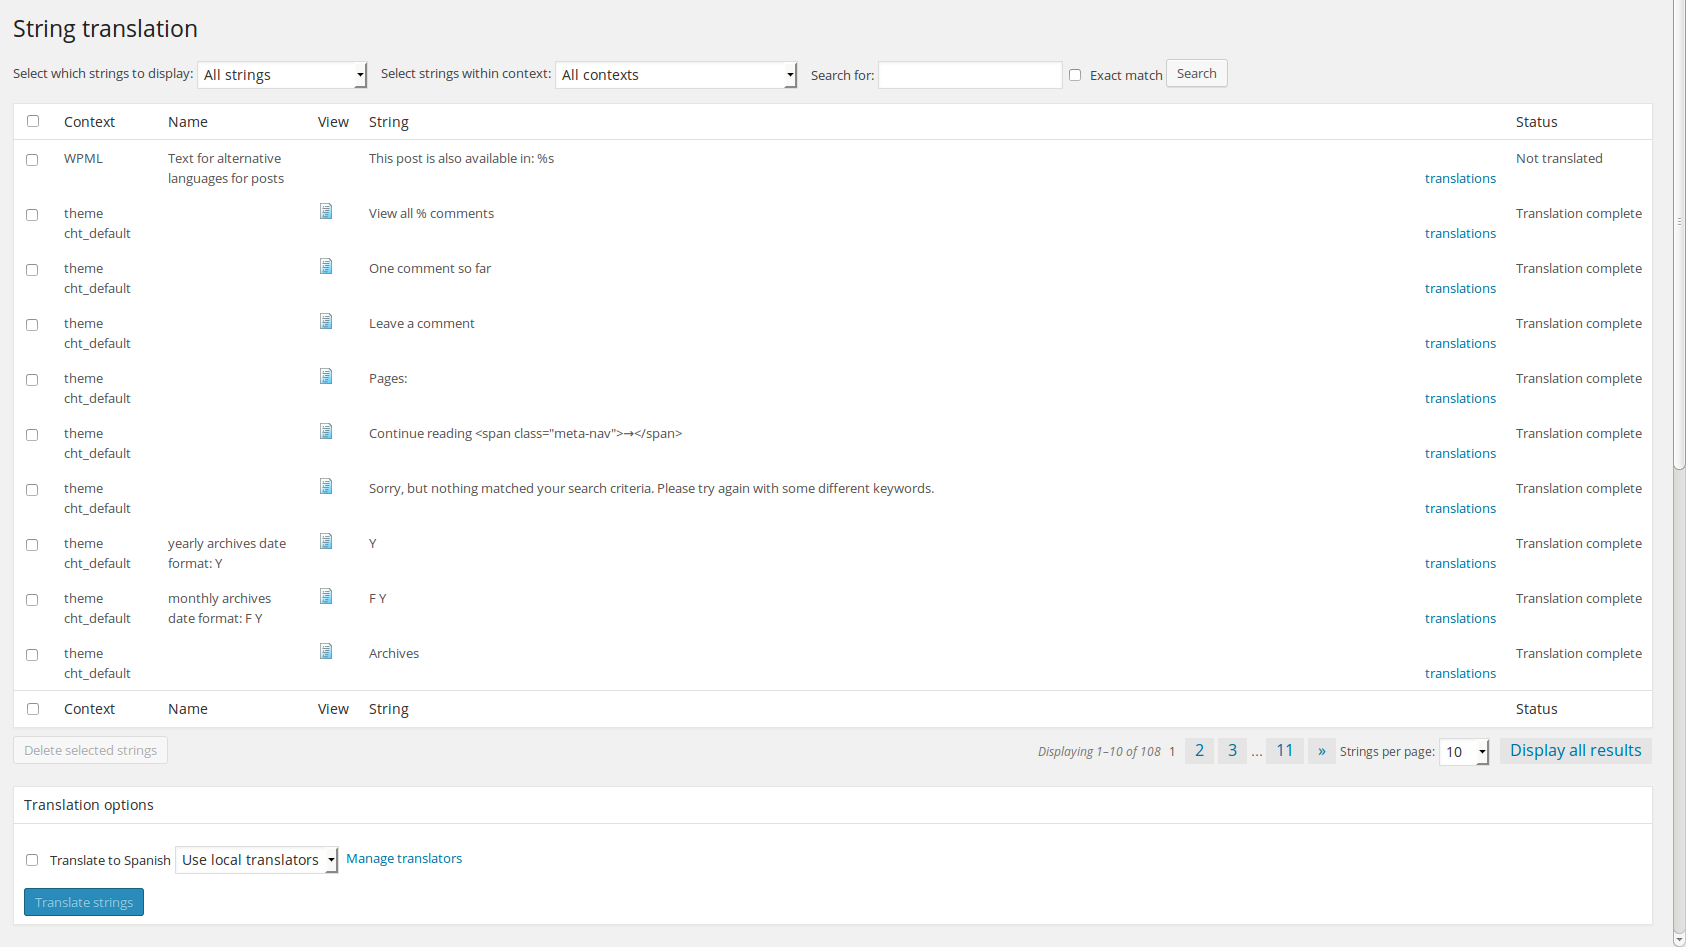
You can then see from WPML->String Translation the theme strings and which ones are translated or not, and complete the translation from there:
Play around with the different filters for this display (on top of the page), such as the ‘string status’ or the ‘context’.
Other strings to watch for: Did you notice texts such as “Latest from the Blog” or “Read More” in our ‘Spanish’ home page? Or even WPML texts such as “This post is also available in…”? Have you tried to look at a page with some sidebar widgets, in particular the widget titles? Do you have additional plugins that need translation of their texts? Do go to WPML->String Translation to check what strings have incomplete translations and complete those translations. And if for any reason you don’t find the string you want to translate (after following Theme and Plugin Localization instructions), try turning on one of the options to ‘autoregister strings’ (settings at bottom of WPML->String Translation) to register some strings when seen on the front end, or… contacting the theme or plugin authors if needed.
Debugging problems
If you need help with using WPML with Skilled Theme, please head over to our technical forum.
Before posting about issues, we recommend that you review this quick checklist:


